
If you’re a macOS user and want to make it easier to install, update and remove packages and programs on your system, Homebrew is the tool you’re looking for.
What is Homebrew?
Homebrew is an open source package manager written in Ruby by Max Howell in 2009.
Like other package managers such as:
apt.dnf.pacman.winget.
Homebrew allows you to install, update and remove packages and applications via the macOS terminal.
How to install Homebrew on macOS
Installing Homebrew is quick and easy.
Follow the steps below to set up Homebrew on your macOS:
- Open Terminal: You can find Terminal in
Applications > Utilities > Terminal. - Install Homebrew: In the Terminal you have opened, run the following command:
/bin/bash -c \
"$(curl -fsSL https://raw.githubusercontent.com/Homebrew/install/master/install.sh)"
📝 During installation you may be asked for your user password.
🚨 During installation, no errors should be returned to the terminal.
After completing the installation, we need to add Homebrew to the operating system’s PATH:
(echo; echo 'eval "$(/opt/homebrew/bin/brew shellenv)"') >> /Users/apple/.zprofileNow we must reload the operating system environment variables:
eval "$(/opt/homebrew/bin/brew shellenv)"To confirm the installation, you can run the command:
brew --versionIf everything went well, you will see the version of Homebrew that is installed on your operating system.
Using Homebrew
Installing packages (formulae)
Now that Homebrew is installed, you can start using its features to install new packages.
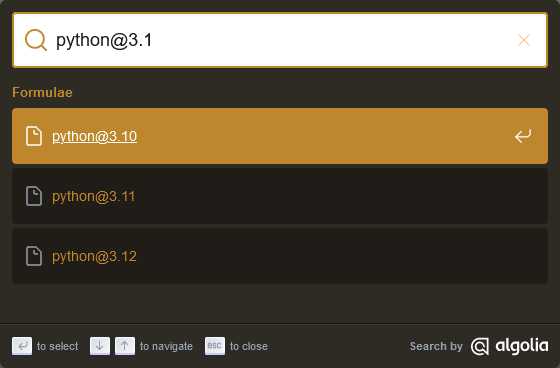
For example, we can use the search command to search for the versions of the Python programming language that are available:
brew search python@3.1You can also search for packages visually on the website:
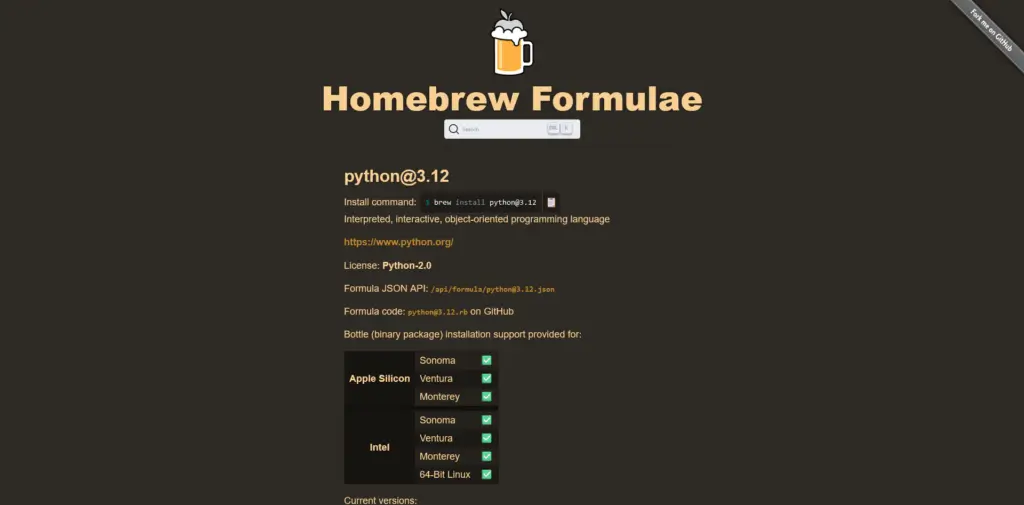
After locating the package, simply install it with the command:
brew install python@3.12If you have searched for the command on the website, the installation command will be displayed on the website interface itself:
Installing applications (cask)
To install applications in Homebrew we must use the --cask flag.
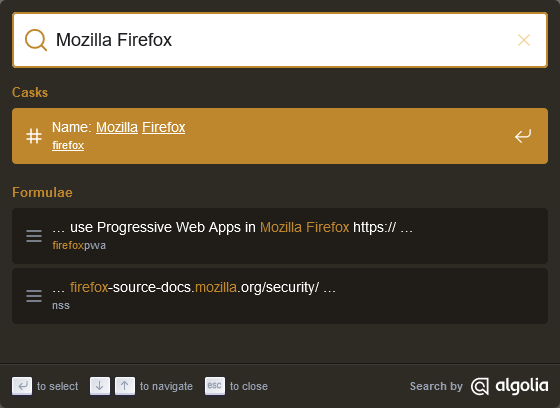
For example, to install the web browser Firefox on macOS we must use search to check if the package exists or even its versions:
brew search --cask firefoxYes, you can also do the consultation via the website:
After locating the desired version, simply run it in the terminal:
brew install --cask firefoxIf you have searched the Homebrew cask website, the installation command will be displayed in the website interface:

Other commands
Update installed packages and applications:
brew update && brew upgradePackages
Update a particular package:
brew update package-nameRemove a given package:
brew uninstall package-nameOr:
brew remove package-nameApplications
Update a particular application:
brew update application-nameRemove a given application:
brew uninstall application-nameOr:
brew remove application-nameConclusion
Homebrew is a powerful tool that simplifies the installation and management of packages on macOS.
Its ability to easily install additional software makes it a valuable addition to the macOS ecosystem, allowing you to explore and use various tools with ease.
Now that you know Homebrew and have learned how to install it on macOS, take the opportunity to explore the wide variety of packages available and take your experience of using Apple’s operating system to the next level.